Blog
화면에 내 모습을 띄워보자 (with. VueJS)
서론
video 태그를 이용해 웹캠으로 사용자의 모습을 화면에 띄우는 방법을 알아보자. MDN 문서를 참고하여 진행했다.
실습은 Vue.js를 사용하여 진행한다.
실습 진행
1. 기반 화면 만들기
<div id="contents">
  <div class="camera">
    <video id="video" ref="video" @canplay="playVideo"></video>
    <button id="takephoto" @click="takePhoto">take Photo</button>
  </div>

  <canvas id= canvas ref="canvas"></canvas>

  <div class="output">
    <img id="photo" :src="photoSrc" alt="스크린 샷이 표기됩니다."/>
  </div>
</div>
video 태그 부분에 웸캠으로 녹화하는 화면이 표시된다. takephoto button을 누르면 현재 화면을 스크린샷 한다.
2. Initailization
// start-video-practice.vue
...

export default {
  name: "start-video-practice",
  data() {
    return {
      video: null,
      canvas: null,
      photoSrc: null,
      streaming: false,
      height: 0,
      width: 320
    }
  },
  mounted() {
    this.video = this.$refs.video;
    this.canvas = this.$refs.canvas;
    this.getMediaStream();
    this.clearPhoto();
  },

...
data
- video :
<video>태그를 바라본다. - canvas :
<canvas>태그를 바라본다. - photoSrc : 스크린샷을 표기하기 위해 이미지태그의 src에 해당하는 부분을 저장한다.
- streaming : 실행중인 비디오 스트림이 있는지 여부를 나타낸다.
- width, height : video 및 canvas의 넓이/높이를 나타낸다.
mounted
video, canvas 변수를 $refs를 이용해 태그를 바라보게 한다. 페이지가 랜더링 된 후에 미디어스트림을 가져오고 canvas 화면을 초기화한다.
3. Methods 작성
Stream 얻기
navigator.mediaDevices.getUserMedia() 를 이용하여 사용자의 Stream값을 얻는다.
이때 결과로 반환되는 stream 값은 video태그에 사용되는 미디어소스 형태이다.
위 Stream이 연결되면 video태그는 HTMLMediaElement.play() 여기서는 video.play()를 이용하여 재생할 수 있다.
getMediaStream() {
  navigator.mediaDevices.getUserMedia(
    {video: true, audio: true}
  ).then((stream) => {
    this.video.srcObject = stream;
    this.video.play();
  }).catch((err) => {
    console.error(`error occurred : ${err}`);
  })
},
화면 재생하기
video.play()가 실행될 때 canplay라는 이벤트가 발생하는데 이때 video가 실행되기 바로 직전의 사전작업을 수행할 수 있다.
<div class="camera">
  <video id="video" ref="video" @canplay="playVideo"></video>
  <button id="takephoto" @click="takePhoto">take Photo</button>
</div>
playVideo() {
  if (!this.streaming) {
    this.streaming = true;
    this.height = this.video.videoHeight / this.video.videoWidth * this.width;

    this.video.height = this.height;
    this.video.width = this.width;
    this.canvas.height = this.height;
    this.canvas.width = this.width;
  }
},
위 실습에서는 video가 Play 되기 전에 video, canvas의 width, heigh를 초기화하는 작업을 수행한다.
단 한번만 수행하기 위해 flag값으로 둔 streaming 값을 이용한다.
스크린샷 찍기
takePhoto()에서 canvas에 video화면을 그리고 canvas화면을 URL로 변환 후 photoSrc에 저장한다.
clearPhoto()를 통해 canvas를 초기화한다.
takePhoto() {
  const context = this.canvas.getContext('2d');
  context.drawImage(this.video,0,0, this.width, this.height);

  this.photoSrc = this.canvas.toDataURL('image/png');
}, clearPhoto() {
  const context = this.canvas.getContext('2d');
  context.fillStyle = "#AAA";
  context.fillRect(0, 0, this.width, this.height);

  this.photoSrc = this.canvas.toDataURL('image/png');
}
Canvas의 자세한 사용은 HTMLCanvasElement를 참고하자.
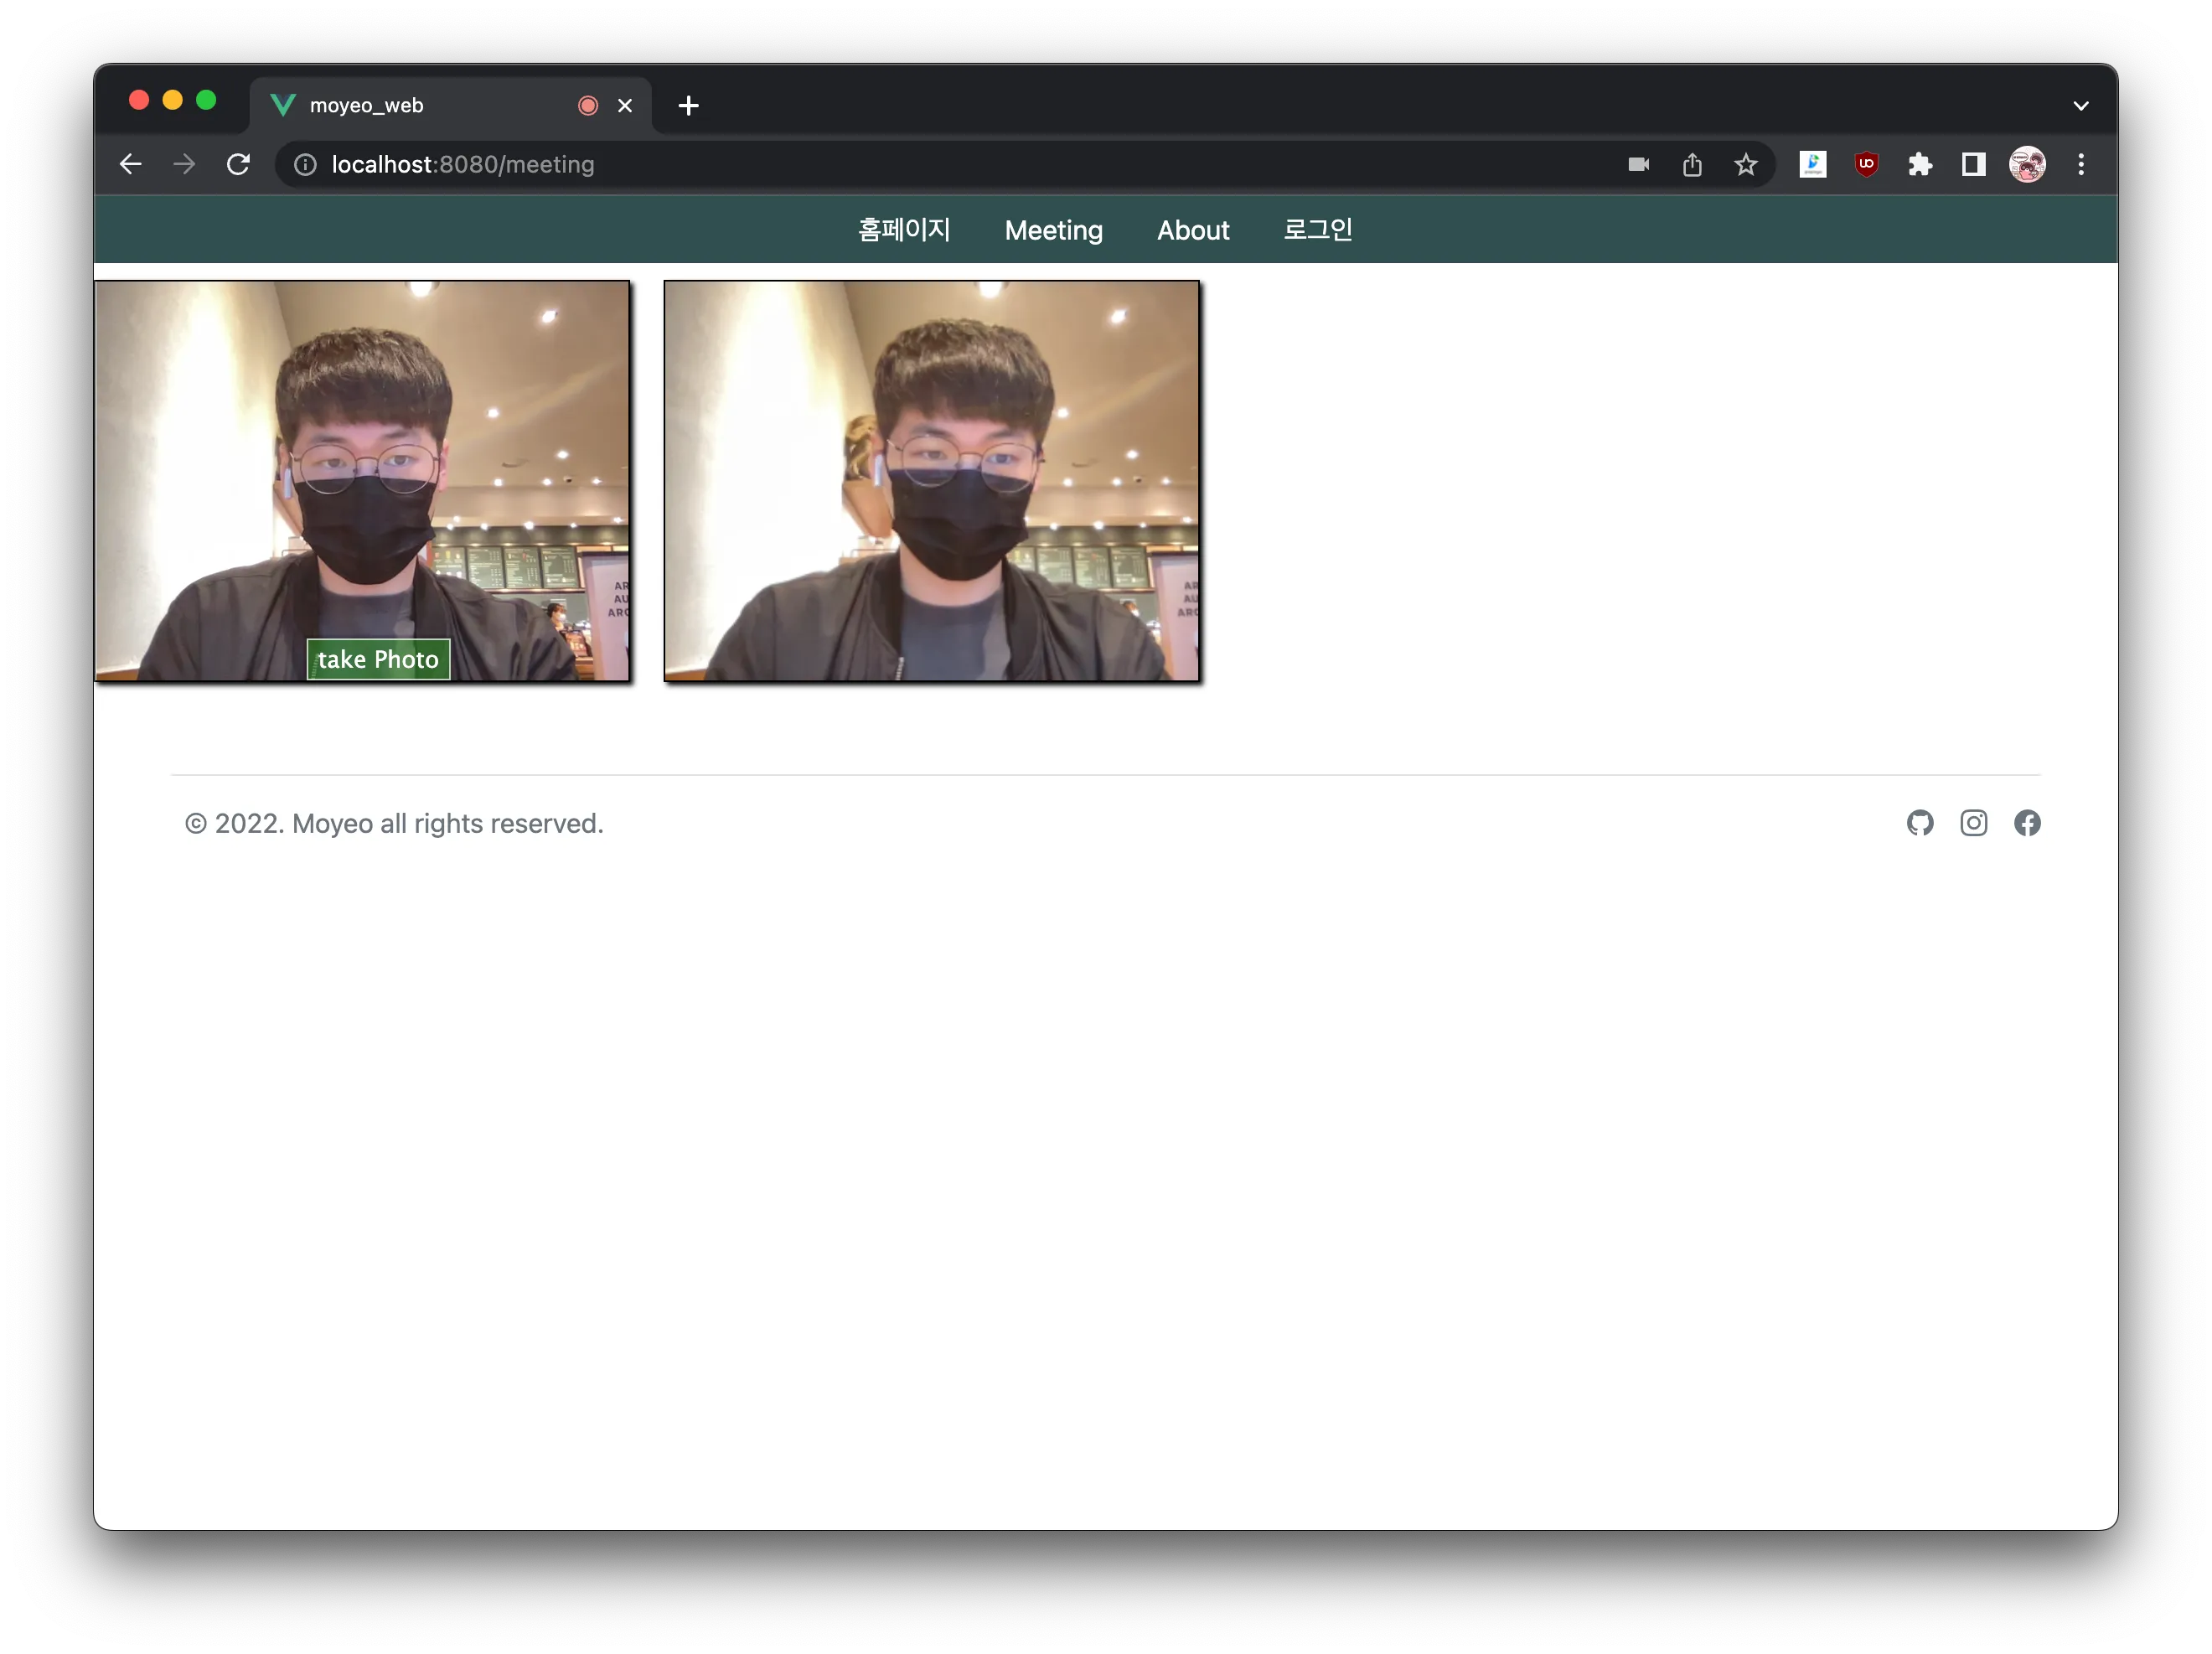
결과
화면
잘 실행되는 것을 확인할 수 있다.
코드
<template>
  <div id="contents">
    <div class="camera">
      <video id="video" ref="video" @canplay="playVideo"></video>
      <button id="takephoto" @click="takePhoto">take Photo</button>
    </div>

    <canvas id= canvas ref="canvas"></canvas>

    <div class="output">
      <img id="photo" :src="photoSrc" alt="The screen capture will appear in this box."/>
    </div>
  </div>
</template>

<script>
export default {
  name: "start-video-practice",
  data() {
    return {
      video: null,
      canvas: null,
      photoSrc: null,
      streaming: false,
      height: 0,
      width: 320
    }
  },
  mounted() {
    this.video = this.$refs.video;
    this.canvas = this.$refs.canvas;
    this.getMediaStream();
    this.clearPhoto();
  },
  methods: {
    getMediaStream() {
      navigator.mediaDevices.getUserMedia(
          {video: true, audio: true}
      ).then((stream) => {
        this.video.srcObject = stream;
        this.video.play();
      }).catch((err) => {
        console.error(`error occurred : ${err}`);
      })
    }, playVideo() {
      if (!this.streaming) {
        this.streaming = true;
        this.height = this.video.videoHeight / this.video.videoWidth * this.width;

        this.video.height = this.height;
        this.video.width = this.width;
        this.canvas.height = this.height;
        this.canvas.width = this.width;
      }
    }, takePhoto() {
      const context = this.canvas.getContext('2d');
      context.drawImage(this.video,0,0, this.width, this.height);

      this.photoSrc = this.canvas.toDataURL('image/png');
    }, clearPhoto() {
      const context = this.canvas.getContext('2d');
      context.fillStyle = "#AAA";
      context.fillRect(0, 0, this.width, this.height);

      this.photoSrc = this.canvas.toDataURL('image/png');
    }
  }
}
</script>

<style scoped>
#video {
  border: 1px solid black;
  box-shadow: 2px 2px 3px black;
  width: 320px;
  height: 240px;
}

#photo {
  border: 1px solid black;
  box-shadow: 2px 2px 3px black;
  width: 320px;
  height: 240px;
}

#canvas {
  display: none;
}

.camera {
  width: 340px;
  display: inline-block;
}

.output {
  width: 340px;
  display: inline-block;
  vertical-align: top;
}

#takephoto {
  display: block;
  position: relative;
  margin-left: auto;
  margin-right: auto;
  bottom: 32px;
  background-color: rgba(0, 150, 0, 0.5);
  border: 1px solid rgba(255, 255, 255, 0.7);
  box-shadow: 0px 0px 1px 2px rgba(0, 0, 0, 0.2);
  font-size: 14px;
  font-family: "Lucida Grande", "Arial", sans-serif;
  color: rgba(255, 255, 255, 1);
}
</style>
Reference
https://developer.mozilla.org/en-US/docs/Web/API/Media_Capture_and_Streams_API/Taking_still_photos